![Straker AI Logo - Blue-Black - Horizontal_500ppi-2.png]](https://help.straker.ai/hs-fs/hubfs/Straker%20AI%20Logo%20-%20Blue-Black%20-%20Horizontal_500ppi-2.png?width=188&height=65&name=Straker%20AI%20Logo%20-%20Blue-Black%20-%20Horizontal_500ppi-2.png)
Adding the Straker Verify Node to n8n
Here's a quick guide on how to add the Straker Verify node in n8n:
-
Get n8n: If you haven't already, set up your free trial with n8n at https://n8n.io/. Make sure you're using the latest stable version for full compatibility with the Straker Verify node.
-
Create a New Workflow: In n8n, go to your workflows and click "Create Workflow."
-
Find and Install the Node: Click the '+' button on the far right to open the node panel. Search for "Straker Verify" and click "Install" when it appears.

the Straker Verify Template
Adding the Straker Verify Node to n8n
You have two easy ways to import the Straker Verify template:
-
Import from URL: Click the three dots in your n8n workflow, select "Import from URL," and paste the following URL:
https://raw.githubusercontent.com/strakergroup/int-n8n-verify/refs/heads/master/Simple%20Straker%20Verify%20Workflow.json -
Import from File: Alternatively, you can download the template file directly and then select "Import from file" in n8n.
Choose the method that works best for you!
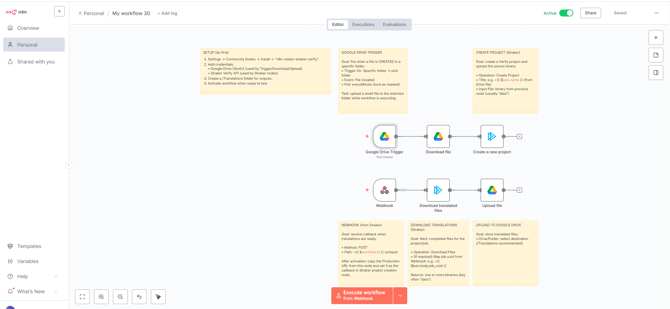
Setting up Google Drive and Verify Credentials
Before running the workflow, you'll need to link your Google Drive and Verify accounts. This is a one-time setup.
-
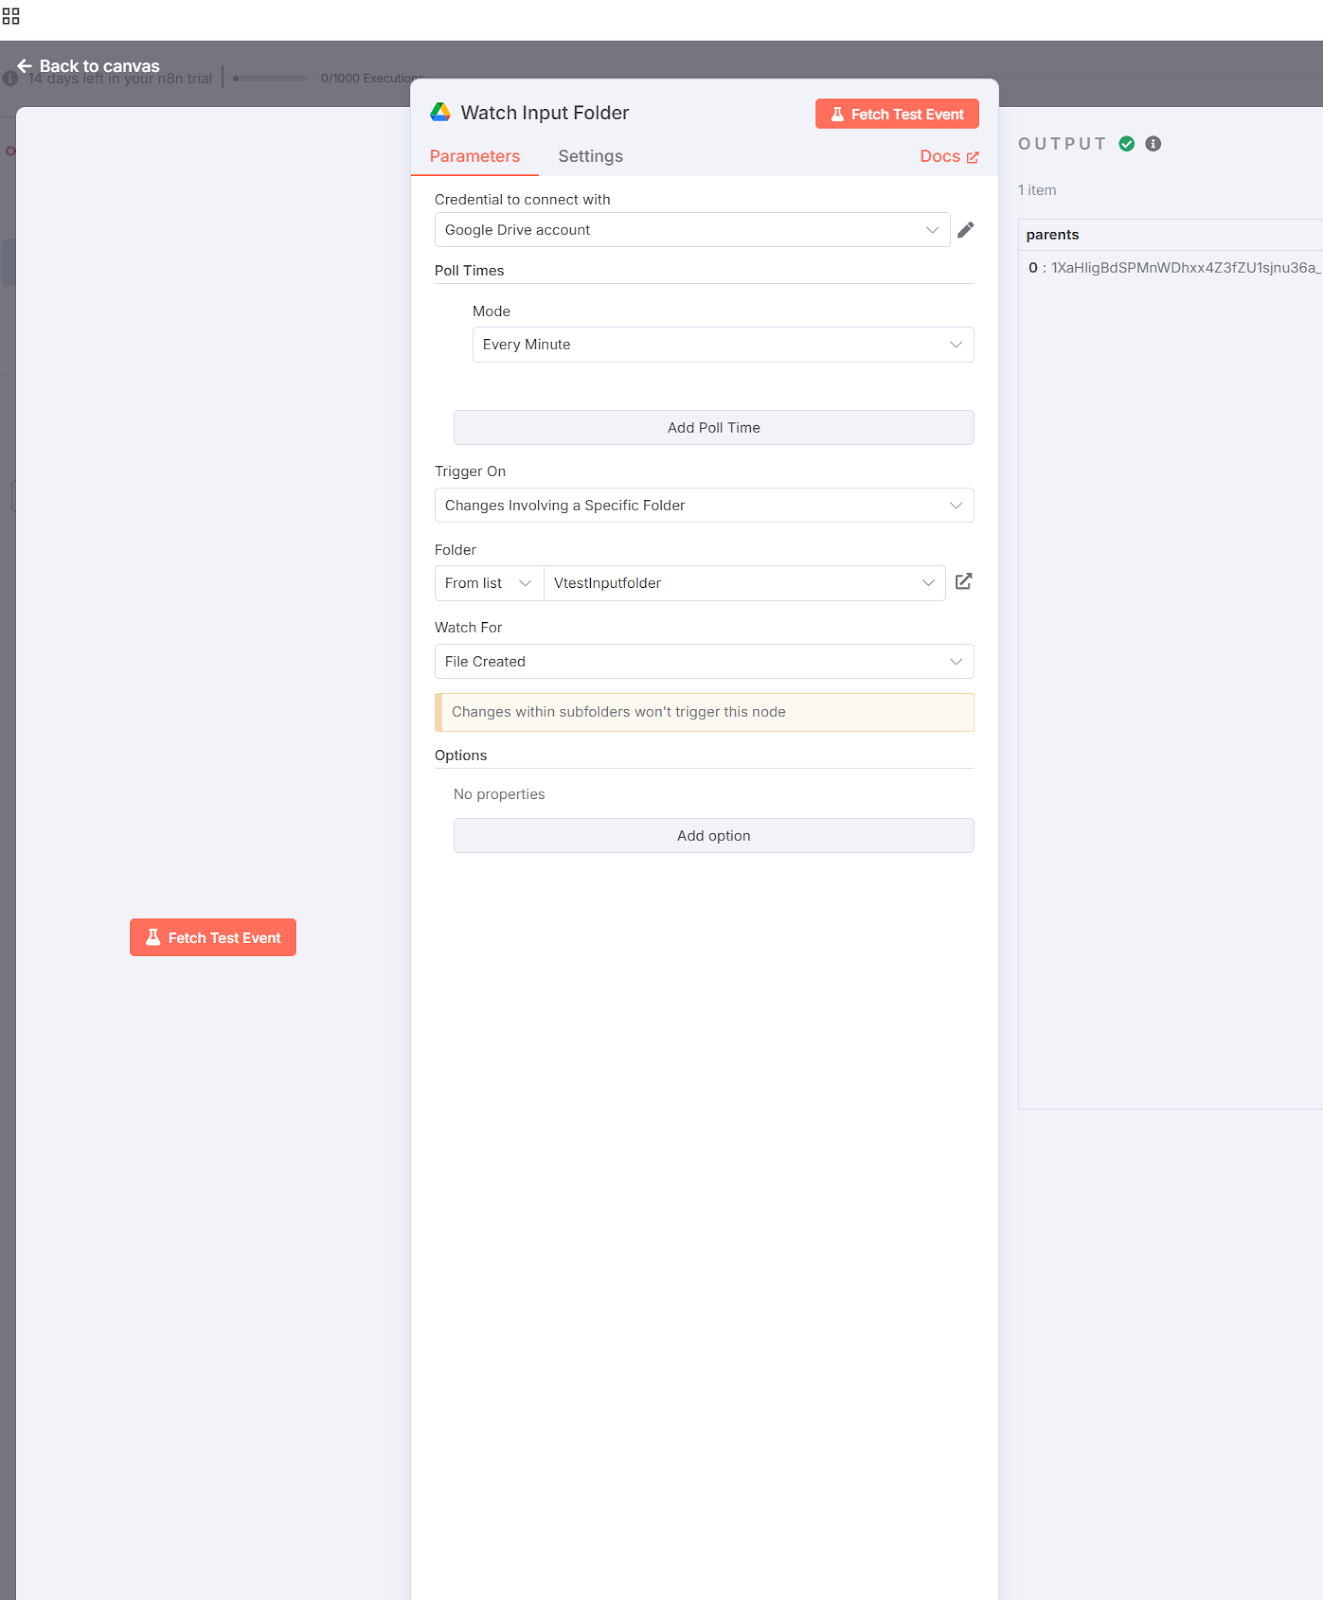
Open "Watch Input Folder" Node: Double-click the first node in your Straker Verify template, labeled "Watch Input Folder."
-
Enter Google Drive Credentials: In the "Parameters" tab, locate "Credential to connect with" and click the pencil icon to edit. Enter your Client ID and Client Secret. (If you don't have these, please contact your organization's IT administrator.)
Connecting Google Drive and Retrieving Your Verify API Key
Now that you've entered your Google Drive credentials, let's connect your folder and get your Straker Verify API key.
Link Your Google Drive Folder
-
Select Your Input Folder: In the "Watch Input Folder" node, scroll down to the "Folder" field. If you haven't already, create a new folder in your Google Drive named "Input folder" for your file uploads. Then, select this "Input folder" from the dropdown menu in n8n.
-
Connect Google Drive: Click the "Connect Google Drive" button to finalize the connection.
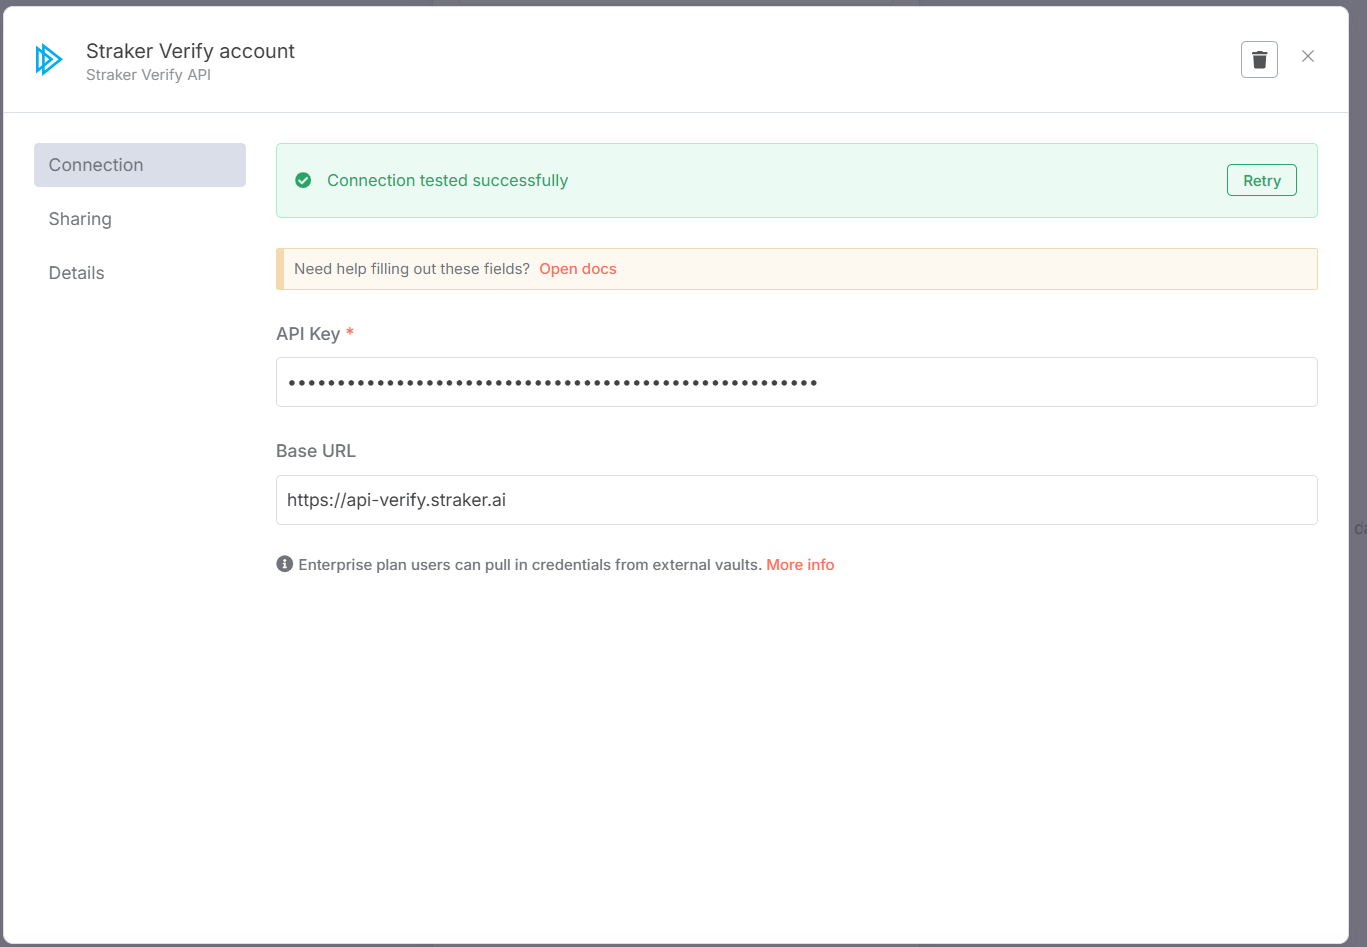
Get Your Straker Verify API Key
You'll need an API key to connect to Straker Verify.
-
First-time users:
-
Sign in to the Straker Verify Platform.
-
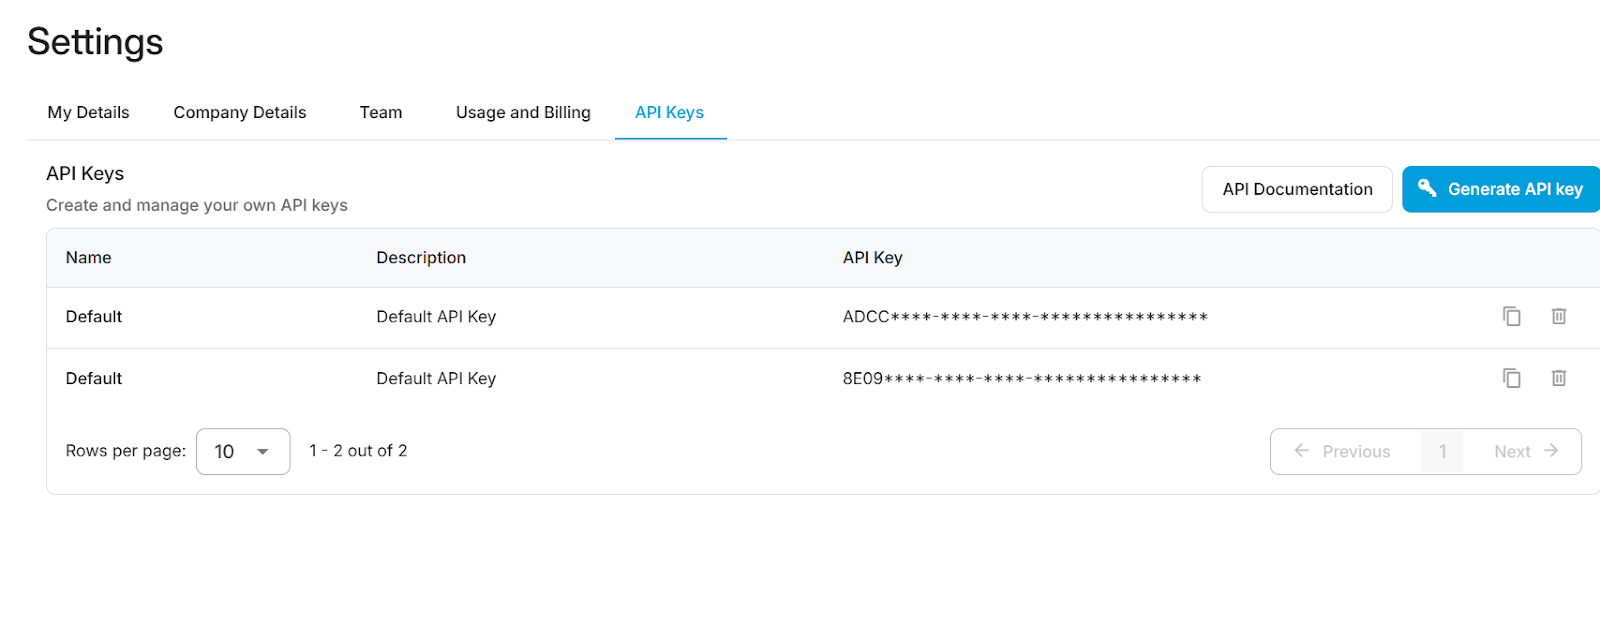
Go to Settings (bottom-left corner).
-
Select the API Keys tab and copy your access token.
-
-
Returning users:
-
Go directly to the Straker Verify Platform.
-
Click on Settings (bottom-left corner).
-
Select the API Keys tab and copy your access token.
-
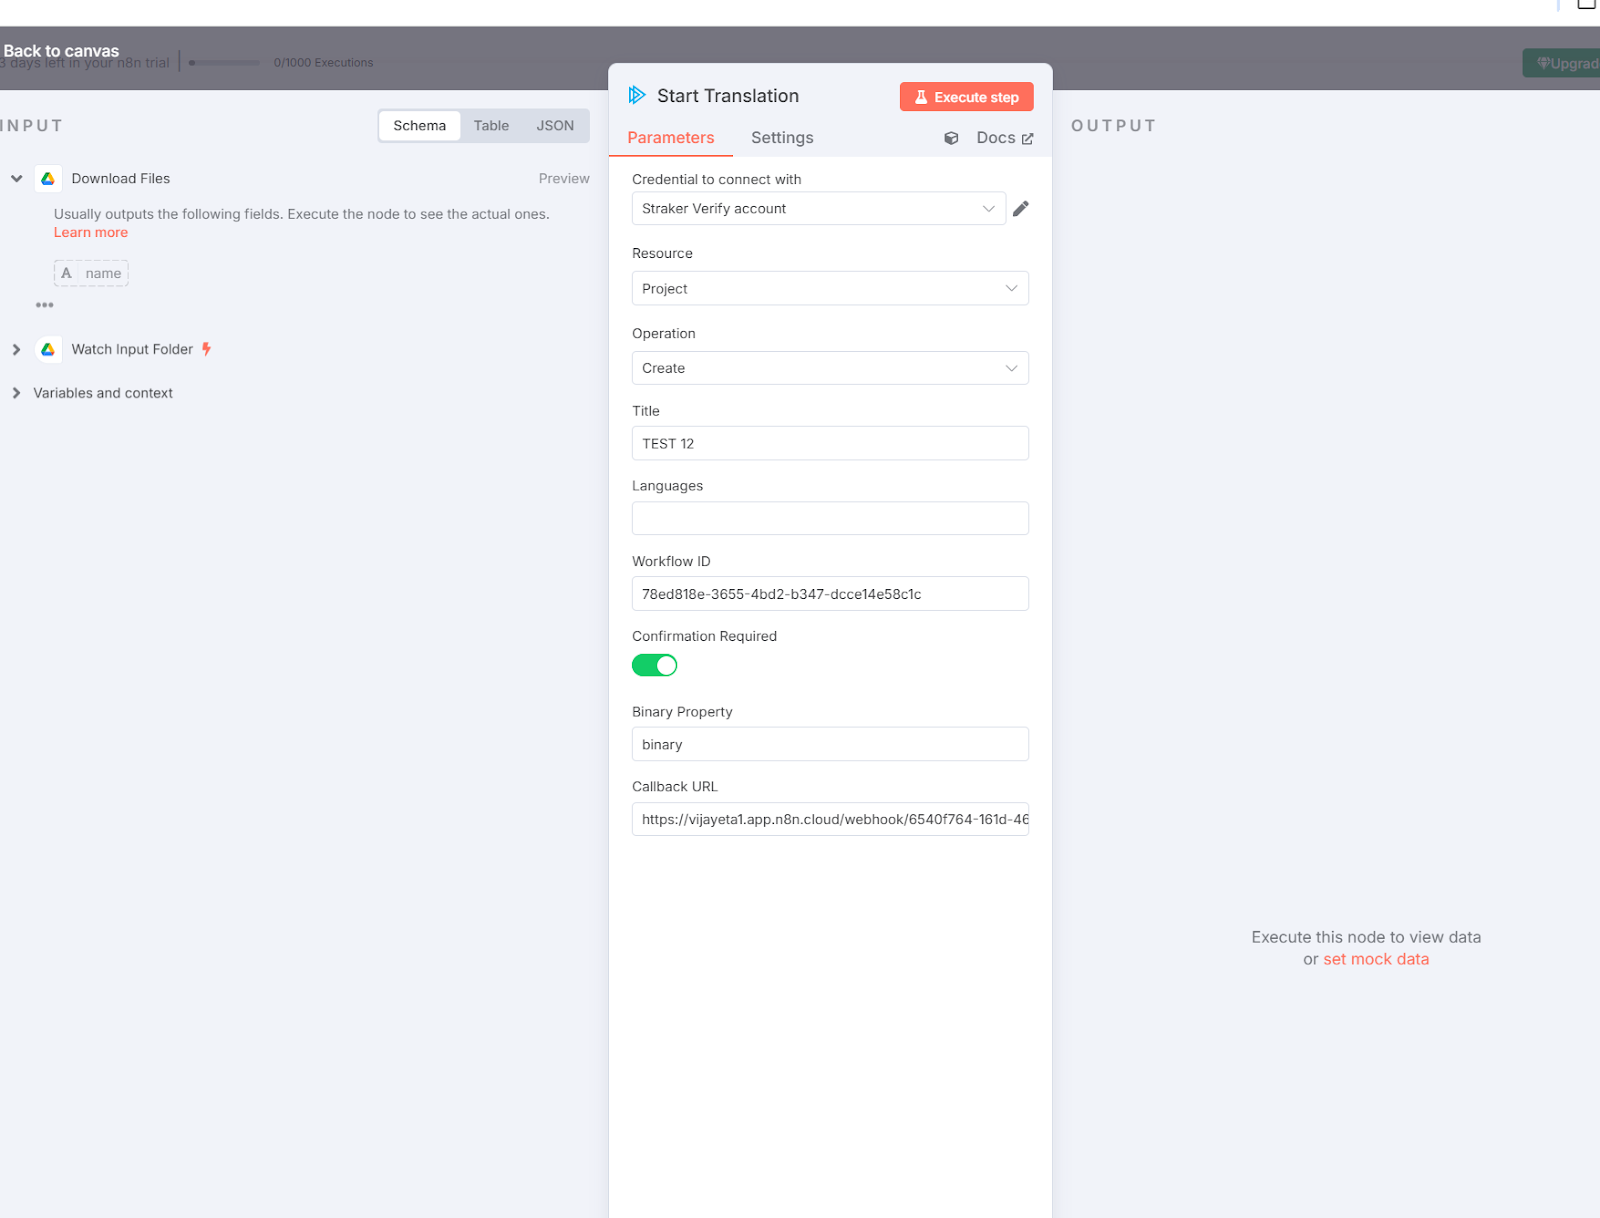
Once you have your access token, return to n8n, double-click the "Start Translation" node (with the Straker icon), click the pencil icon, and paste your Access Token.
4. Now return to the node and double click the ‘Start Translation’ node with the Straker icon. Click the pencil icon and paste your access token.
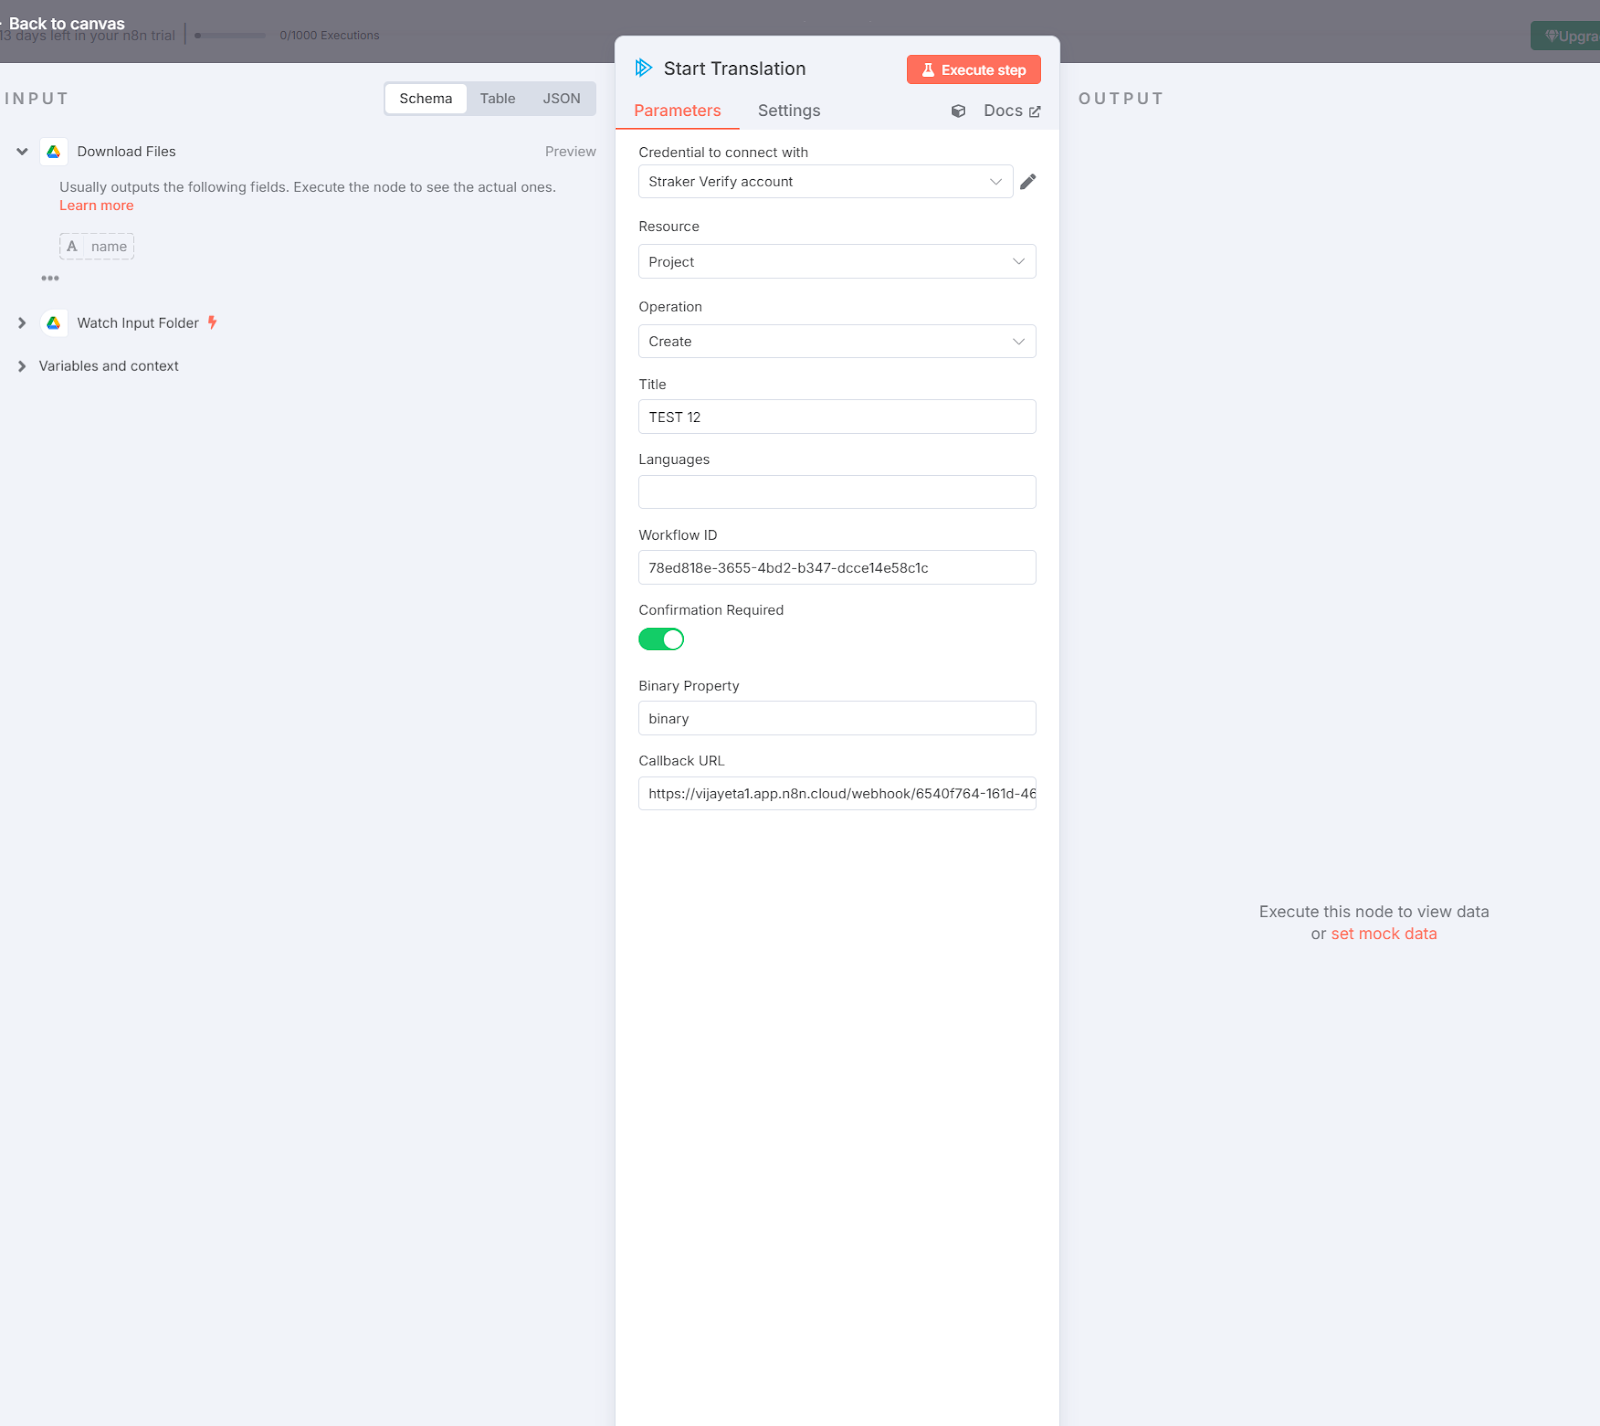
5. Next, go to ‘Wait for Completion’ Node to obtain your callback URL. Under the ‘Production URL’, copy the URL.
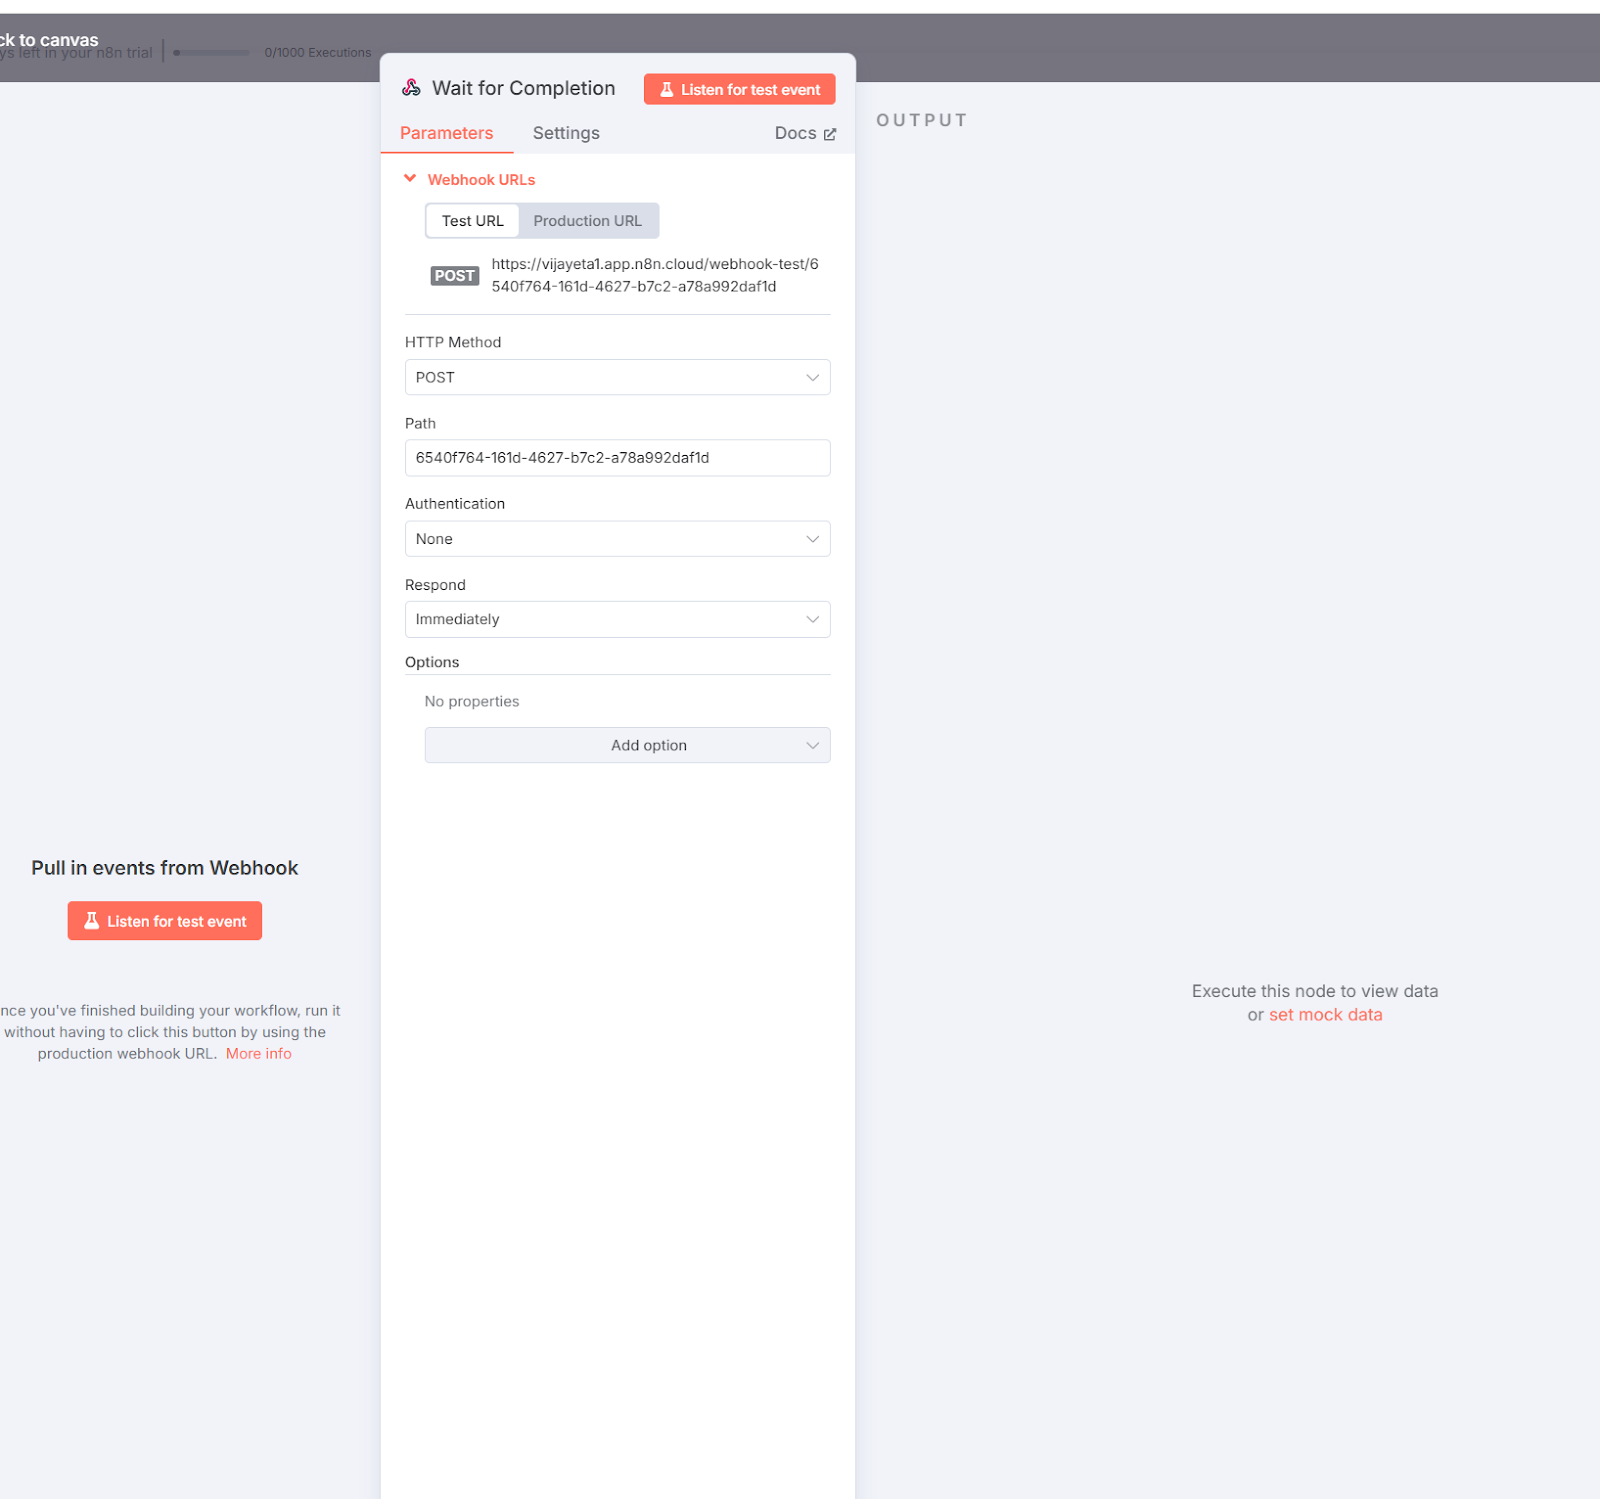
6. Now return to the previous ‘Start Translation’ node, paste the URL under ‘Callback URL’
7. Next, click ‘Save to Output Folder’ and select your ‘output folder’ that you have already created in your Google Drive. If you haven’t, you need to create another folder in your Google Drive and name it ‘Output folder’.
8. Finally toggle 'Inactive' to 'Activate the Workflow'
Now
Number of Files:
To ensure optimal performance and processing speed in your Straker Verify workflow, there are limits on how many files you can submit in a single run:
- Maximum of **10 files** if you are submitting content for **20 target languages**
- Maximum of **20 files** if you are submitting content for **10 target languages**
low in action!