
Translation with context
With Globalization Pipeline, product development team can now provide attachments and associate them with bundles and resource entries. When a translation request (TR) is submitted for human translation, translators can refer to the associated attachments and get the context information of the resource entries.
Workflow
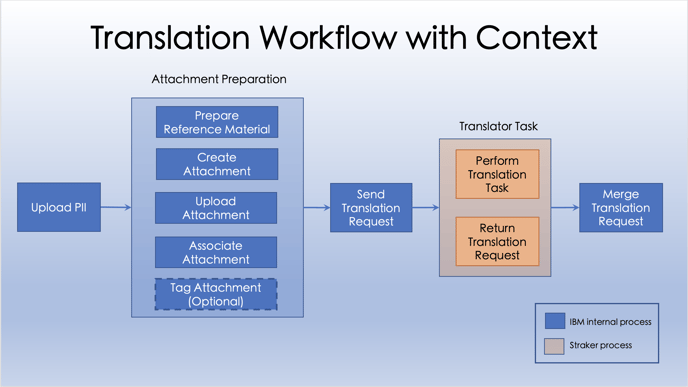
Below diagram shows a typical workflow of translation with context using Globalization Pipeline. The block Attachment Preparation is the newly introduced step for achieving translation with context.
Step 1: Prepare reference material
First, you need to prepare the attachment used for translation reference. One of the most useful translation reference could be the English UI screenshots that contain the strings to be translated or to be reviewed by a human translator. Besides UI screenshots, you can also provide related documents such as HTML or PDF files, or a URL link that points to some public web sites like IBM Knowledge Center.
Three types of attachments are supported in Globalization Pipeline:
-
Image files, including:
-
JPEG
-
GIF
-
PNG
-
SVG
-
▸ For more information on preparing screenshots images, refer to "How-to / Prepare UI screenshots".
▸ If you have a huge amount of screenshots and would like to leverage the auto-association feature, you need to prepare the screenshots of pseudo language "English (XP)" as well. Refer to "How-to / Perform auto-association" for more information.
-
Document files, including:
-
PDF
-
HTML
-
-
External reference links:
-
URL links that point to public web resources
-
Step 2: Create attachment
Now, let's create the attachments on GP.
The attachment we are going to create is like a container that holds the attachment content for different languages. Attachment content can be uploaded only for a specific language after the attachment container is created.
With Dashboard
Assuming you would like to create an attachment of a JPEG image for a specific panel.
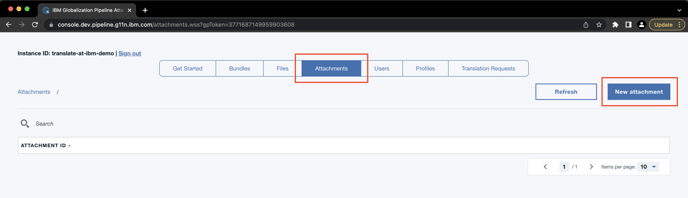
1. On the Attachments tab, click the New Attachment button.
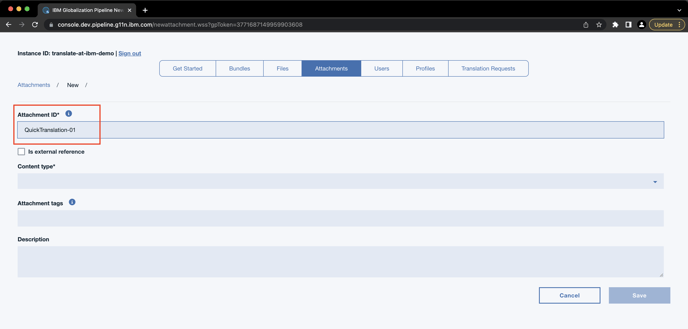
2. Enter an Attachment ID.
⚠ Attachment ID needs to be unique within the instance.
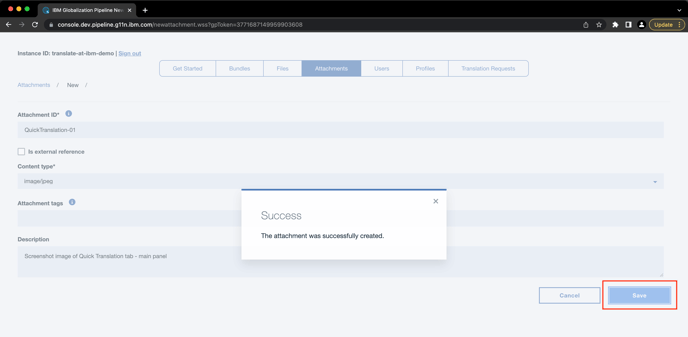
3. Select the Content Type of attachment from the drop-down menu.
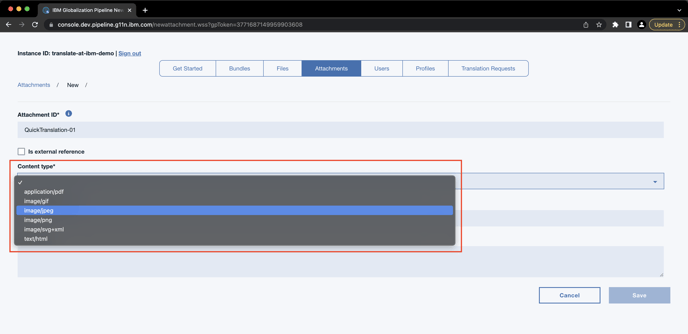
ⓘ If the attachment is an external reference link, select the "Is external reference" checkbox.
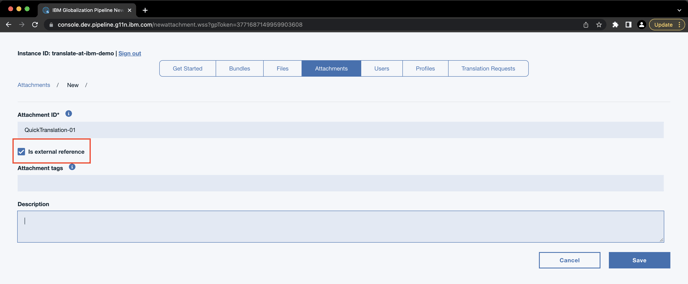
4. Optionally, you can enter a Description for the attachment.

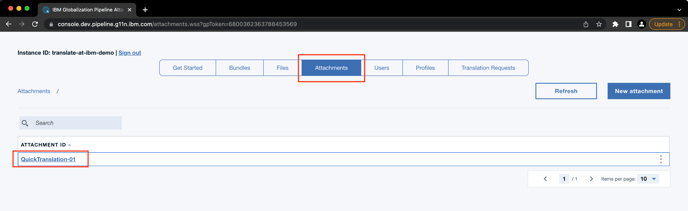
5. Click Save to complete the attachment creation. You will see the newly created attachment in the table.
With command line interface tool (gp-cli)
1. Use create-atachment command to create an attachment with a certain content type. For example, below command creates an image/jpg attachment with id attachment01:
java -jar gp-cli.jar create-attachment -a attachment01 -t image/jpg -d "description of the attachment (optional)" -j creds.json
2. Use create-atachment command with -e option to create an external reference attachment:
java -jar gp-cli.jar create-attachment -a attachment02 -e -j creds.json
▸ For the latest information, refer to the create-attachment command in gp-cli README page: https://github.ibm.com/1t1p/gpv2-java-tools/tree/master/gp-java-tools/gp-cli#create-attachment
Step 3: Upload attachment
After the attachment is created, you can upload the content for a certain language.
With Dashboard
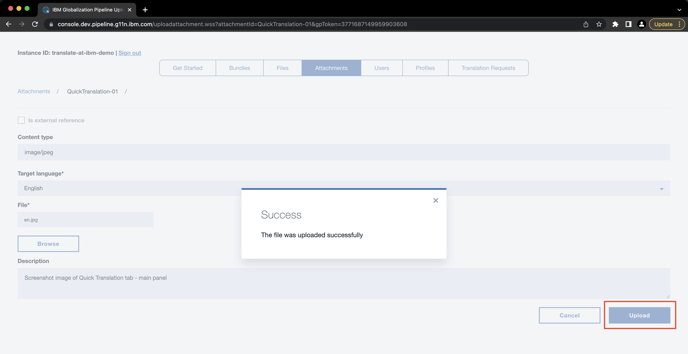
Assuming you would like to upload a English screenshot JPEG image to the attachment.
1. On the Attachment tab, select the attachment you created.
2. Click the Upload Content button at the right-hand side.

3. For the Target language field, select the language you want to upload. (In this example, we select English.)
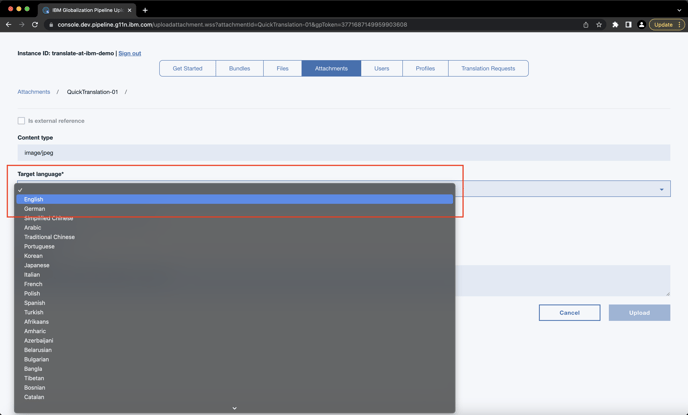
4. For the File field, click Browse to select the file you want to upload. (In this example, we select the JPEG screenshot file we prepared in advance.)

5. Click Upload to complete the uploading.
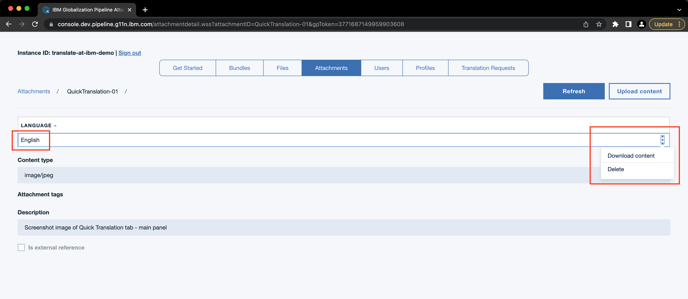
Now, you can see the English row appears on the table. From the overflow menu, you can choose to download the uploaded content for English, or delete the content if it is no longer needed.
With command line interface tool (gp-cli)
1. Use import-atachment command to import a file to an attachment for a specific language:
java -jar gp-cli.jar import-attachment -a attachment01 -F path/to/source/image.jpg -l en -j creds.json
2. If the attachment is an external reference, use -ln option to provide a link for a specific language:
java -jar gp-cli.jar import-attachment -a attachment01 -ln https://it.docs.ibm.com/myreference.html -l en -j creds.json
▸ For the latest information, refer to the import-attachment command in gp-cli README page: https://github.ibm.com/1t1p/gpv2-java-tools/tree/master/gp-java-tools/gp-cli#import-attachment
Step 4: Associate attachment
You need to establish the association between a resource entry and an attachment by updating the resource entry data for translators to reference the attachment content when translating an entry. (Note: it will become handy for the upcoming ICT, if ICT is planned)

With Dashboard
Assuming you would like to associate the attachment previously established to one resource string with the resource key of "qualityoptions.mt".
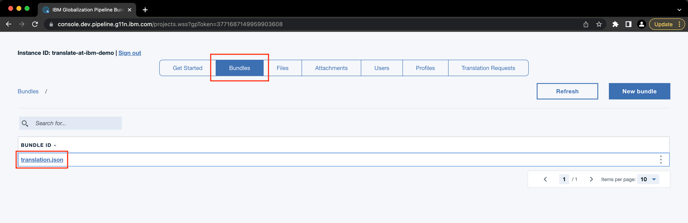
1. On the Bundles tab, select the bundle that contains the resource string to be associated.
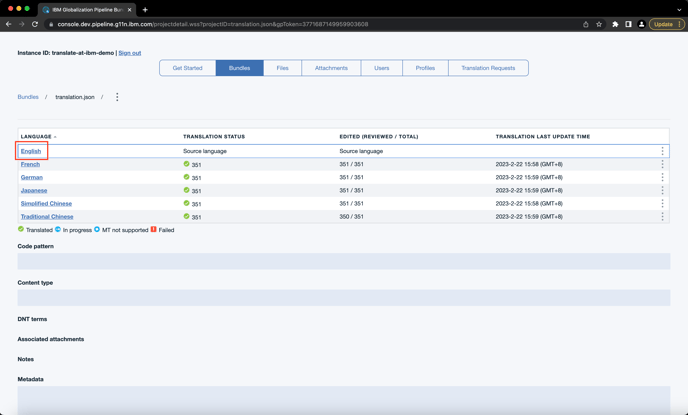
2. Click English in the LANGUAGE column to view the source entries.
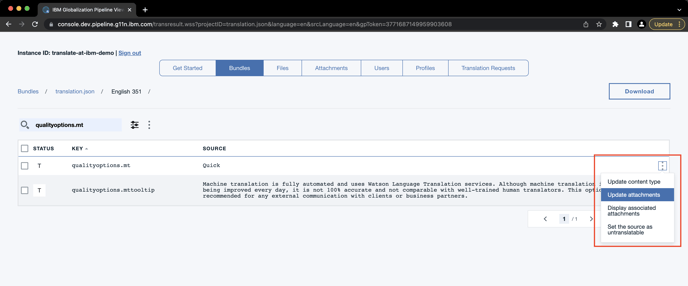
3. Find the resource entry to be associated. You can search it with the resource key using the search bar at top of the table.

4. From the overflow menu, select Update attachments.
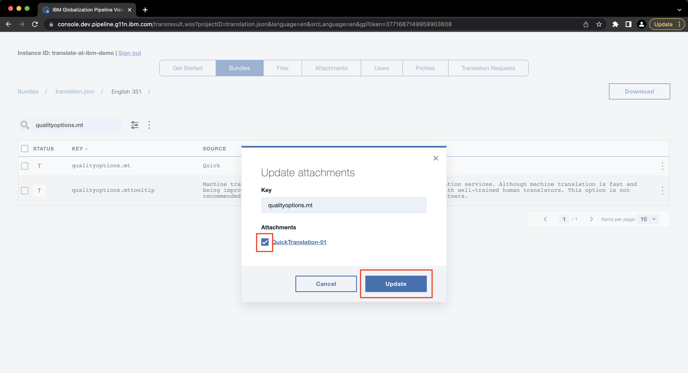
5. In the Attachments list, select the attachment(s) you want to associate with. Click Update to save the change.
To check the association result, you can select Display associated attachments from the overflow menu.
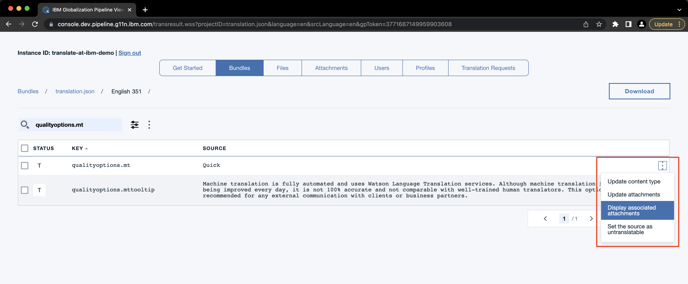
You can see the list of associated attachments on the pop-up window.

With command line interface tool (gp-cli)
1. Use the command update-res-entry to update the attachment association of the resource entry. For example, below command add association of "attachment01" to the resource key "key01" under bundle "bundle01":
java -jar gp-cli.jar update-res-entry -b bundle01 -l en -k "key01" -a attachment01 -j mycreds.json
▸ For the latest information, refer to the update-res-entry command in gp-cli README page: https://github.ibm.com/1t1p/gpv2-java-tools/tree/master/gp-java-tools/gp-cli#update-res-entry-previously-mark
Optional step: Tag attachment
As the feature introduced with the ICT (in-context testing) support, you can have the flexibility to assign multiple tags to each attachment, allowing you to easily group them into different sets for better organization and management. By tagging attachments with a tag to indicate their usage (e.g., "TR_2023May"), it will be handy for you to delete, to locate, or to include attachments into the scope of future ICT.
We recommend you to add the attachment tags when attachments are being created. Please refer to Process ICT (In-context testing) / Step5: Tag attachment for how to tag attachments.
Step 5: Send translation request
After you completed the above steps for all the attachments you have prepared, you can now proceed to send a translation request. As you have created the attachments, uploaded the attachment content, and associated them with the resource strings, the information will be included in the translation request, and the translators will be able to refer to the attached context information, e.g., the English screenshots, when performing translation on their workbench.
▸ The steps to send a translation request (TR) is the same as before. If you are new to Globalization Pipeline, please refer to Sending Content for Human Translation for more details.