![Straker AI Logo - Blue-Black - Horizontal_500ppi-2.png]](https://help.straker.ai/hs-fs/hubfs/Straker%20AI%20Logo%20-%20Blue-Black%20-%20Horizontal_500ppi-2.png?width=188&height=65&name=Straker%20AI%20Logo%20-%20Blue-Black%20-%20Horizontal_500ppi-2.png)
See demo steps on how to add the Straker Verify node
- Set up your free trial with n8n here https://n8n.io/
- After signing in, click on the ‘Admin Panel’ from your left-hand panel at the bottom, then click on ‘Manage’ and the ‘Workspace’ tab to update to the latest n8n version (1.99.1), and then toggle the ‘Verified community nodes’ on and then save changes by clicking the button.
Note: If you already have n8n installed and are on the latest version 1.99.1 then you just need to skip to Step 7 to search for the node and how to use it.

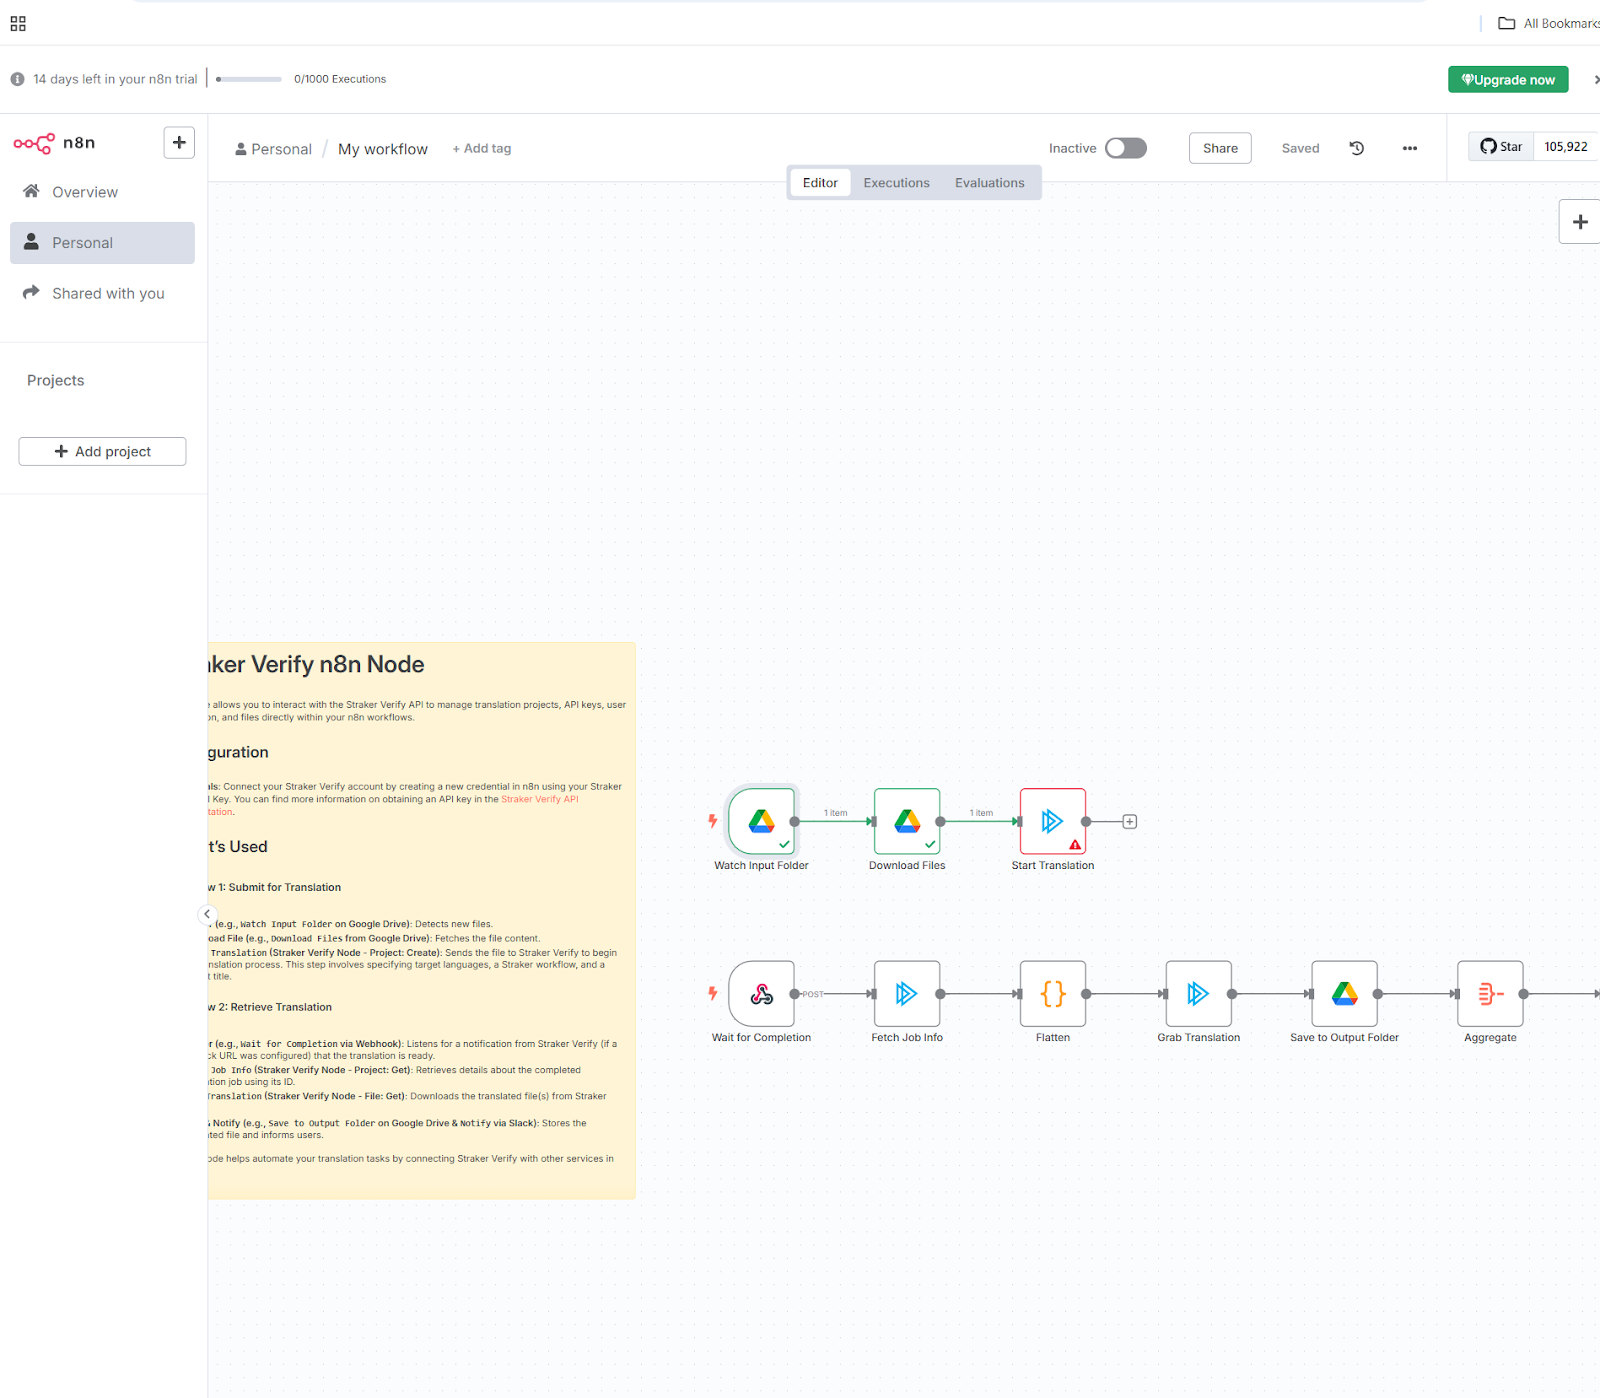
3. Return to the Dashboard tab and go to workflows, and click the ‘Create Workflow' and then click on the '+’ on the far right-hand side to open the navigation panel. You can type and search for the ‘Straker Verify’ node.
4. Click 'Install'

5. You can either; add the Straker Verify Template by clicking on the 3 dots and selecting 'Import from URL', by copying and pasting the URL provided below; https://raw.githubusercontent.com/strakergroup/int-n8n-verify/refs/heads/master/workflows/Simple_Workflow.json
OR Alternatively you can select, 'Import from file' to download the template
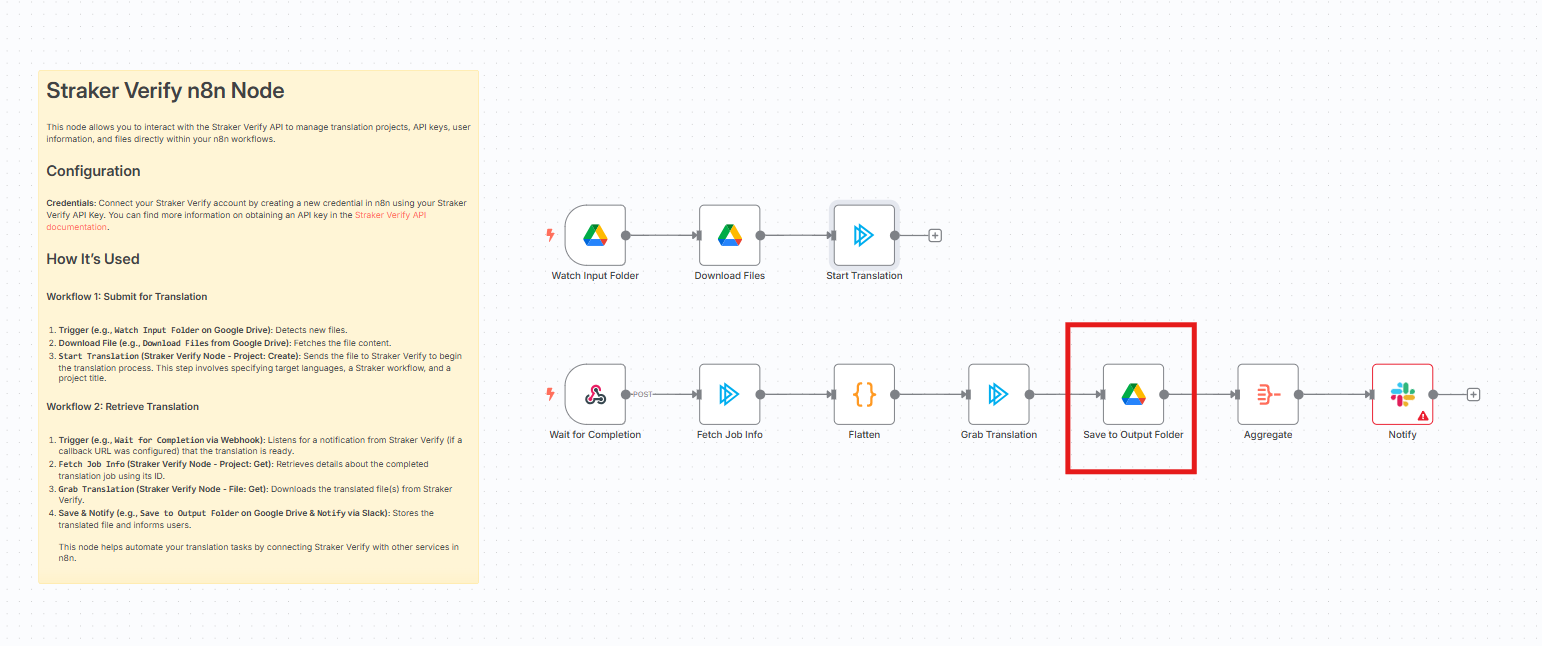
See Straker Verify Template to import the template.

Before executing the workflow a one time set for Google Drive and Login to Verify is required.
For step by step set up instructions see below;
Once your Straker Verify template is ready in n8n, users will need to set up their Google Drive and Verify account credentials.
Steps:
1. Double-click the first node, labelled "Watch Input Folder."- In the Parameters tab, find "Credential to connect with" and click the pencil icon to edit.
- Enter your Client ID and Client Secret.
- You can get this information from your organization's IT administrator.
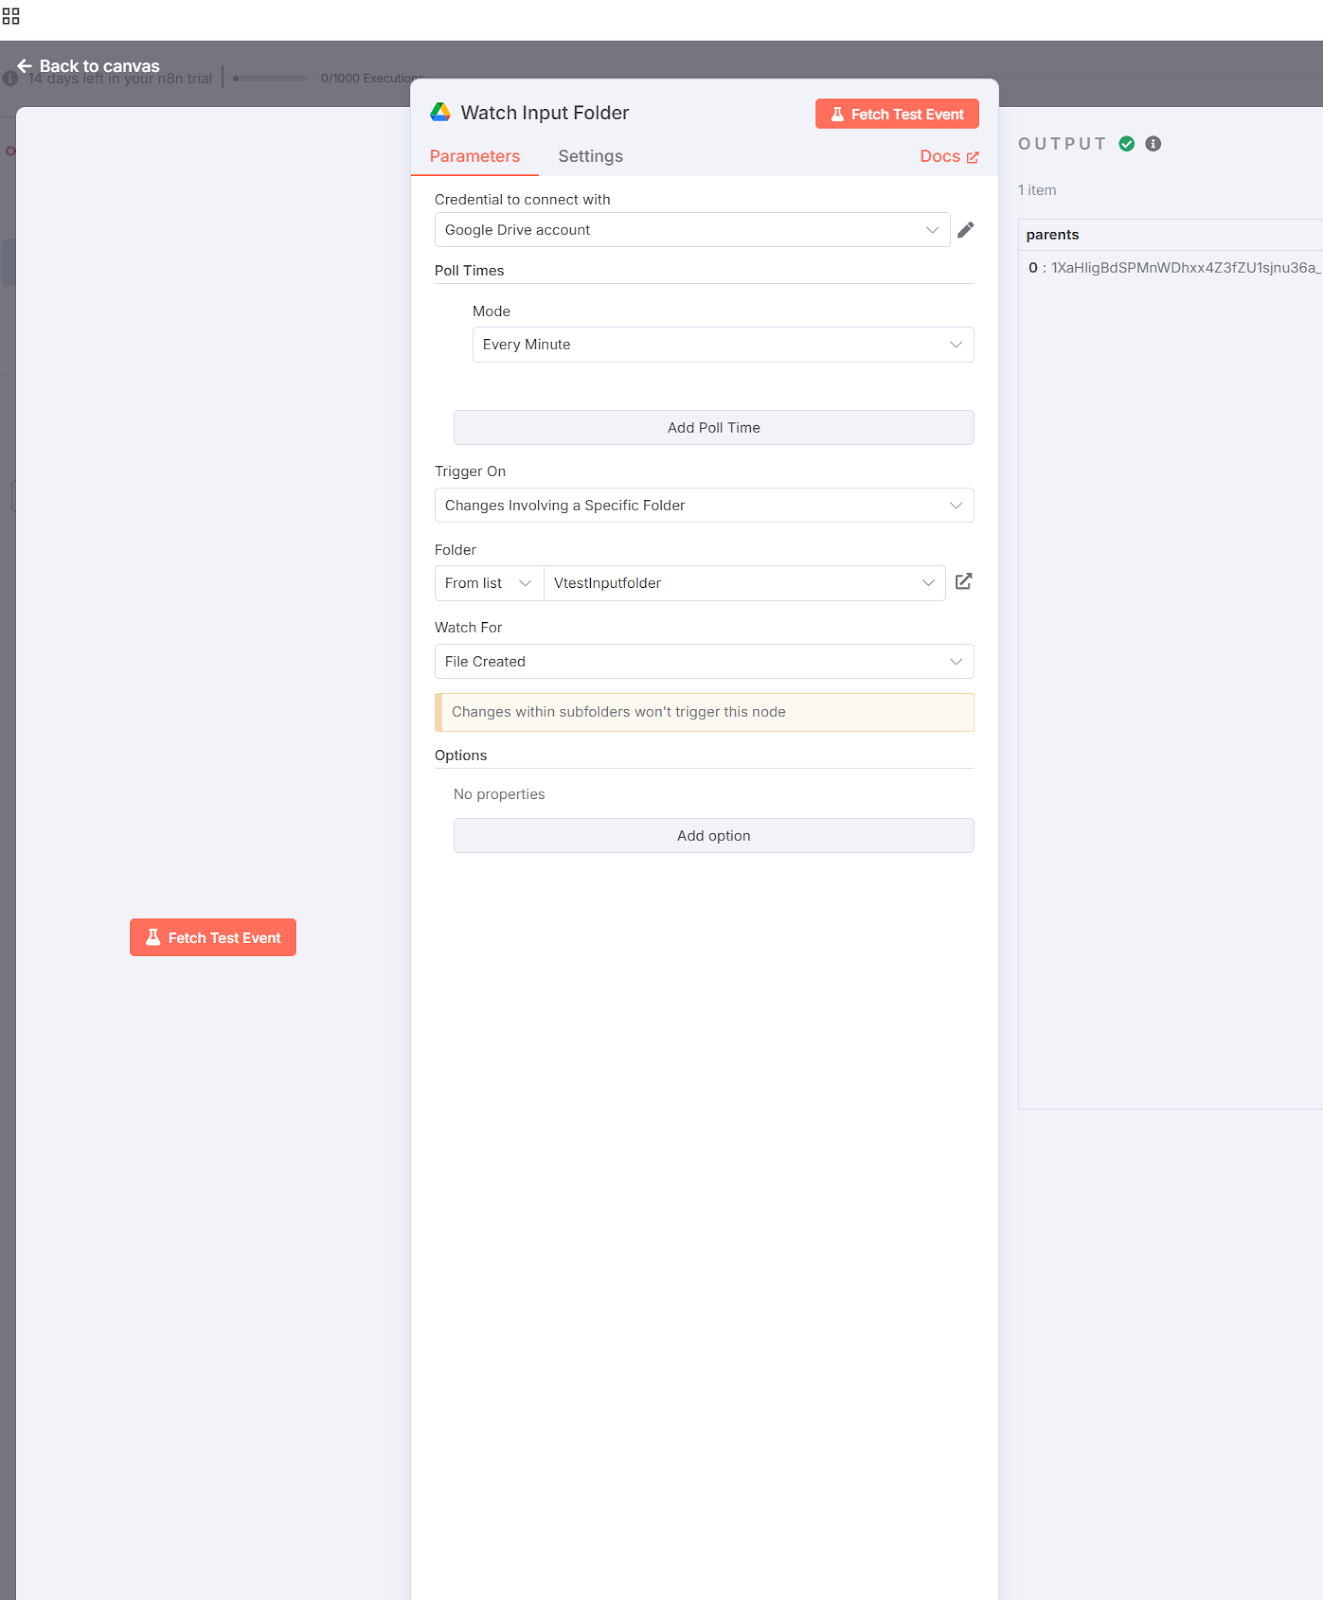
2. Scroll down to the Folder field.
- Select the folder you have already created in your Google Drive.
- If you have not yet created a folder, please go to your Google Drive and create a new one for your file uploads. Name this folder Input folder.
- Return to your n8n workflow and select the "Input folder" from the Folder field.
3. Now click the ‘Connect Google Drive’ button to complete the setup.
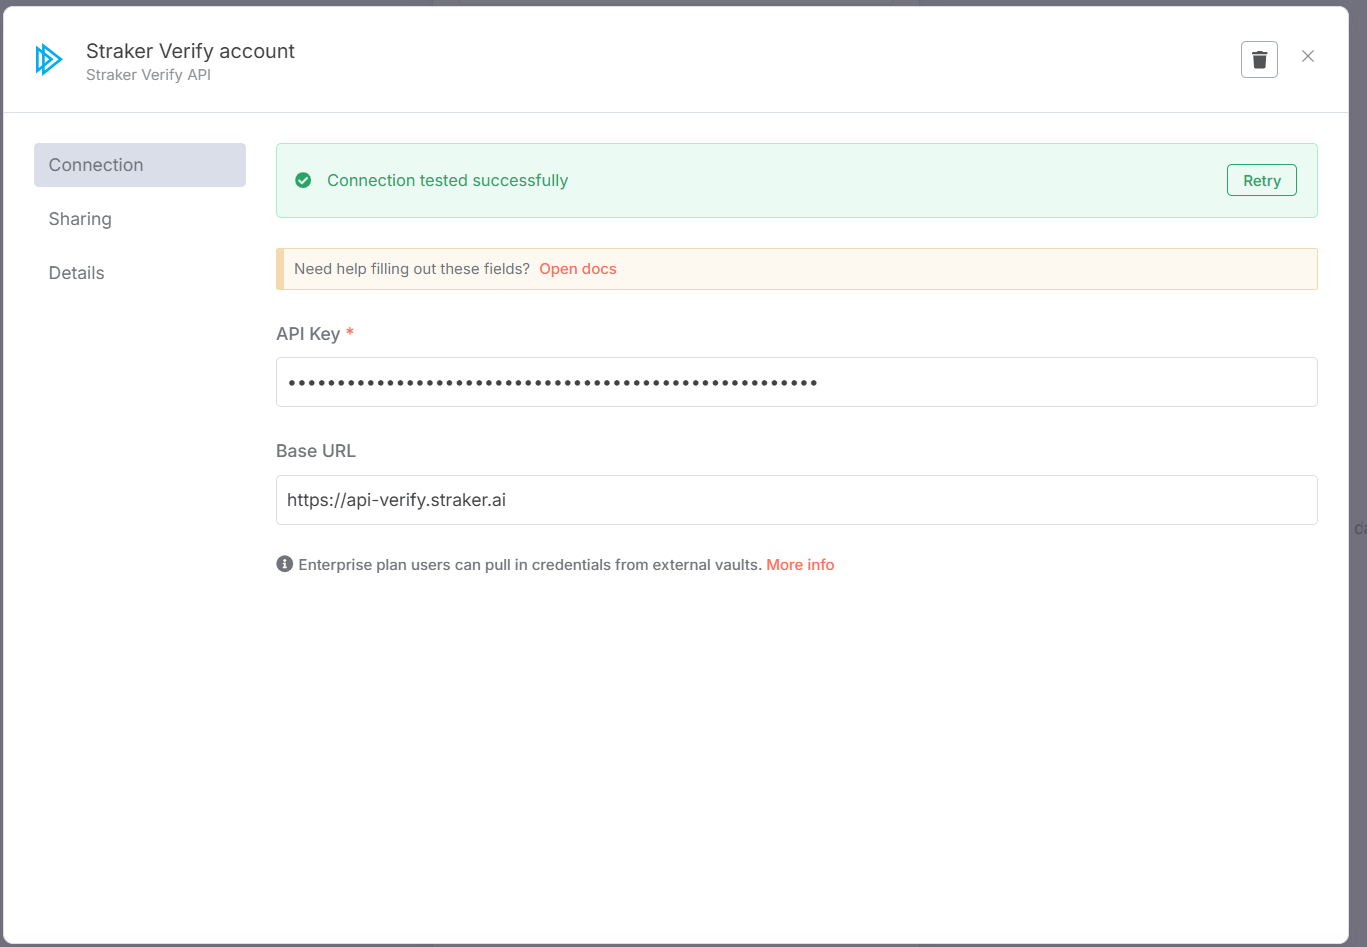
You now need to retrieve your API key.
- If you are a first-time user:
- You need to sign in to the Straker Verify Platform.
- Complete the sign-in process.
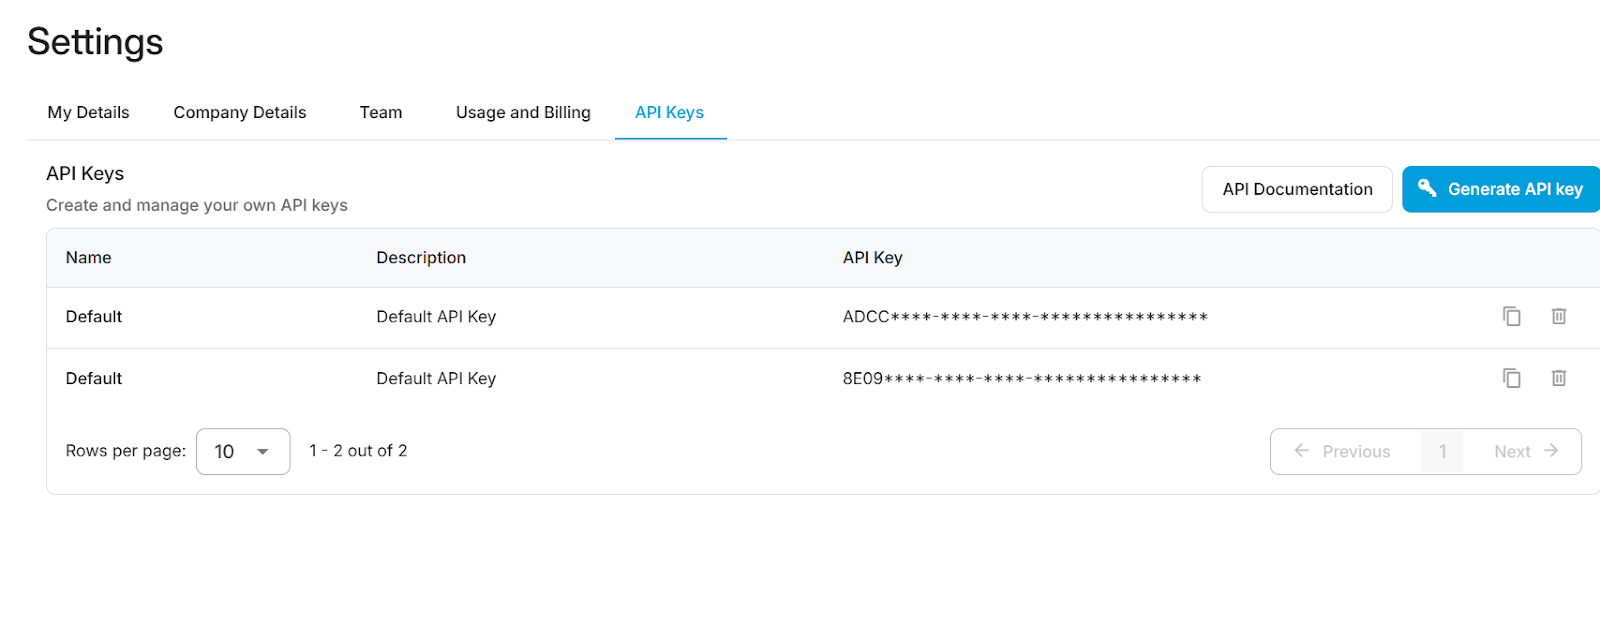
- Navigate to Settings (in the bottom-left corner).
- Go to the API Keys tab and copy your access token.
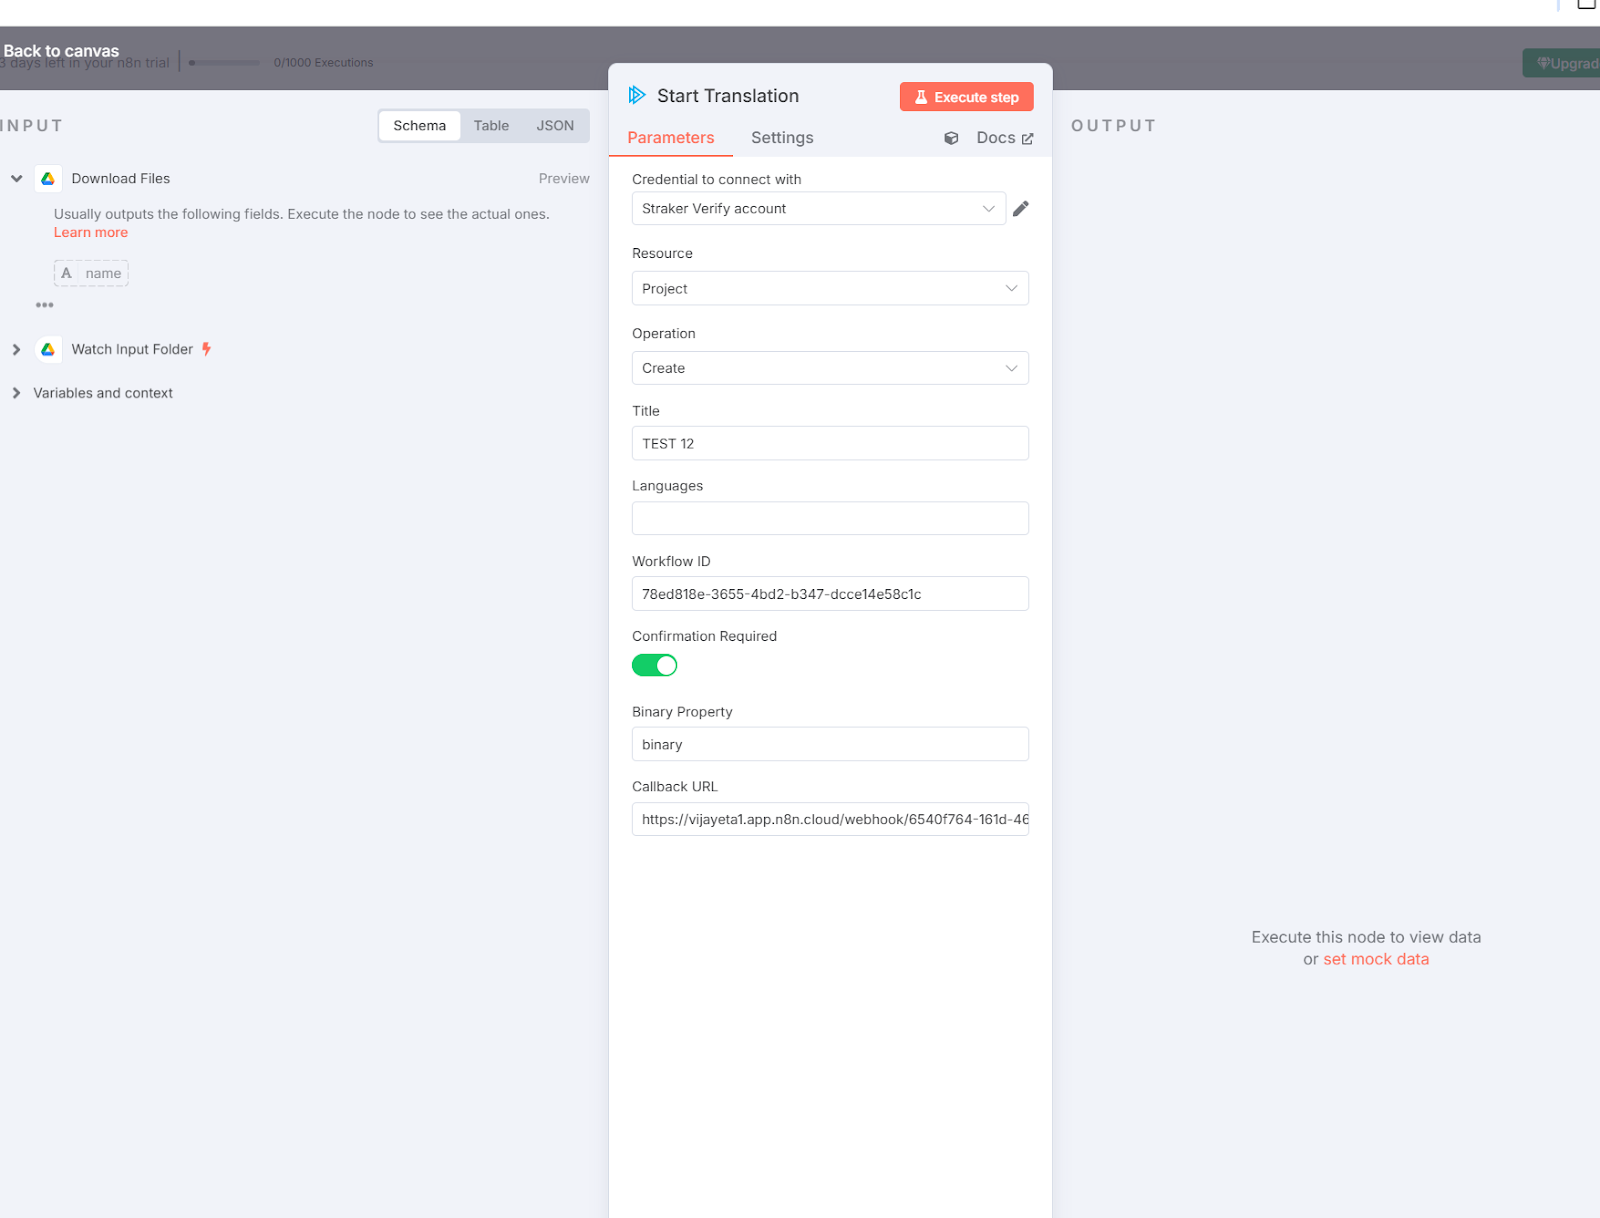
- Return to the node and double-click the ‘Start Translation’ node with the Straker icon. Click the pencil icon and paste your Access Token.
- If you have already signed in before:
- Go directly to the Straker Verify Platform.
- Click on Settings in the bottom-left corner.
- Select the API Keys tab and copy your access token.
- Return to the node and double-click the ‘Start Translation’ node with the Straker icon. Click the pencil icon and paste your Access token.
4. Now return to the node and double click the ‘Start Translation’ node with the Straker icon. Click the pencil icon and paste your access token.
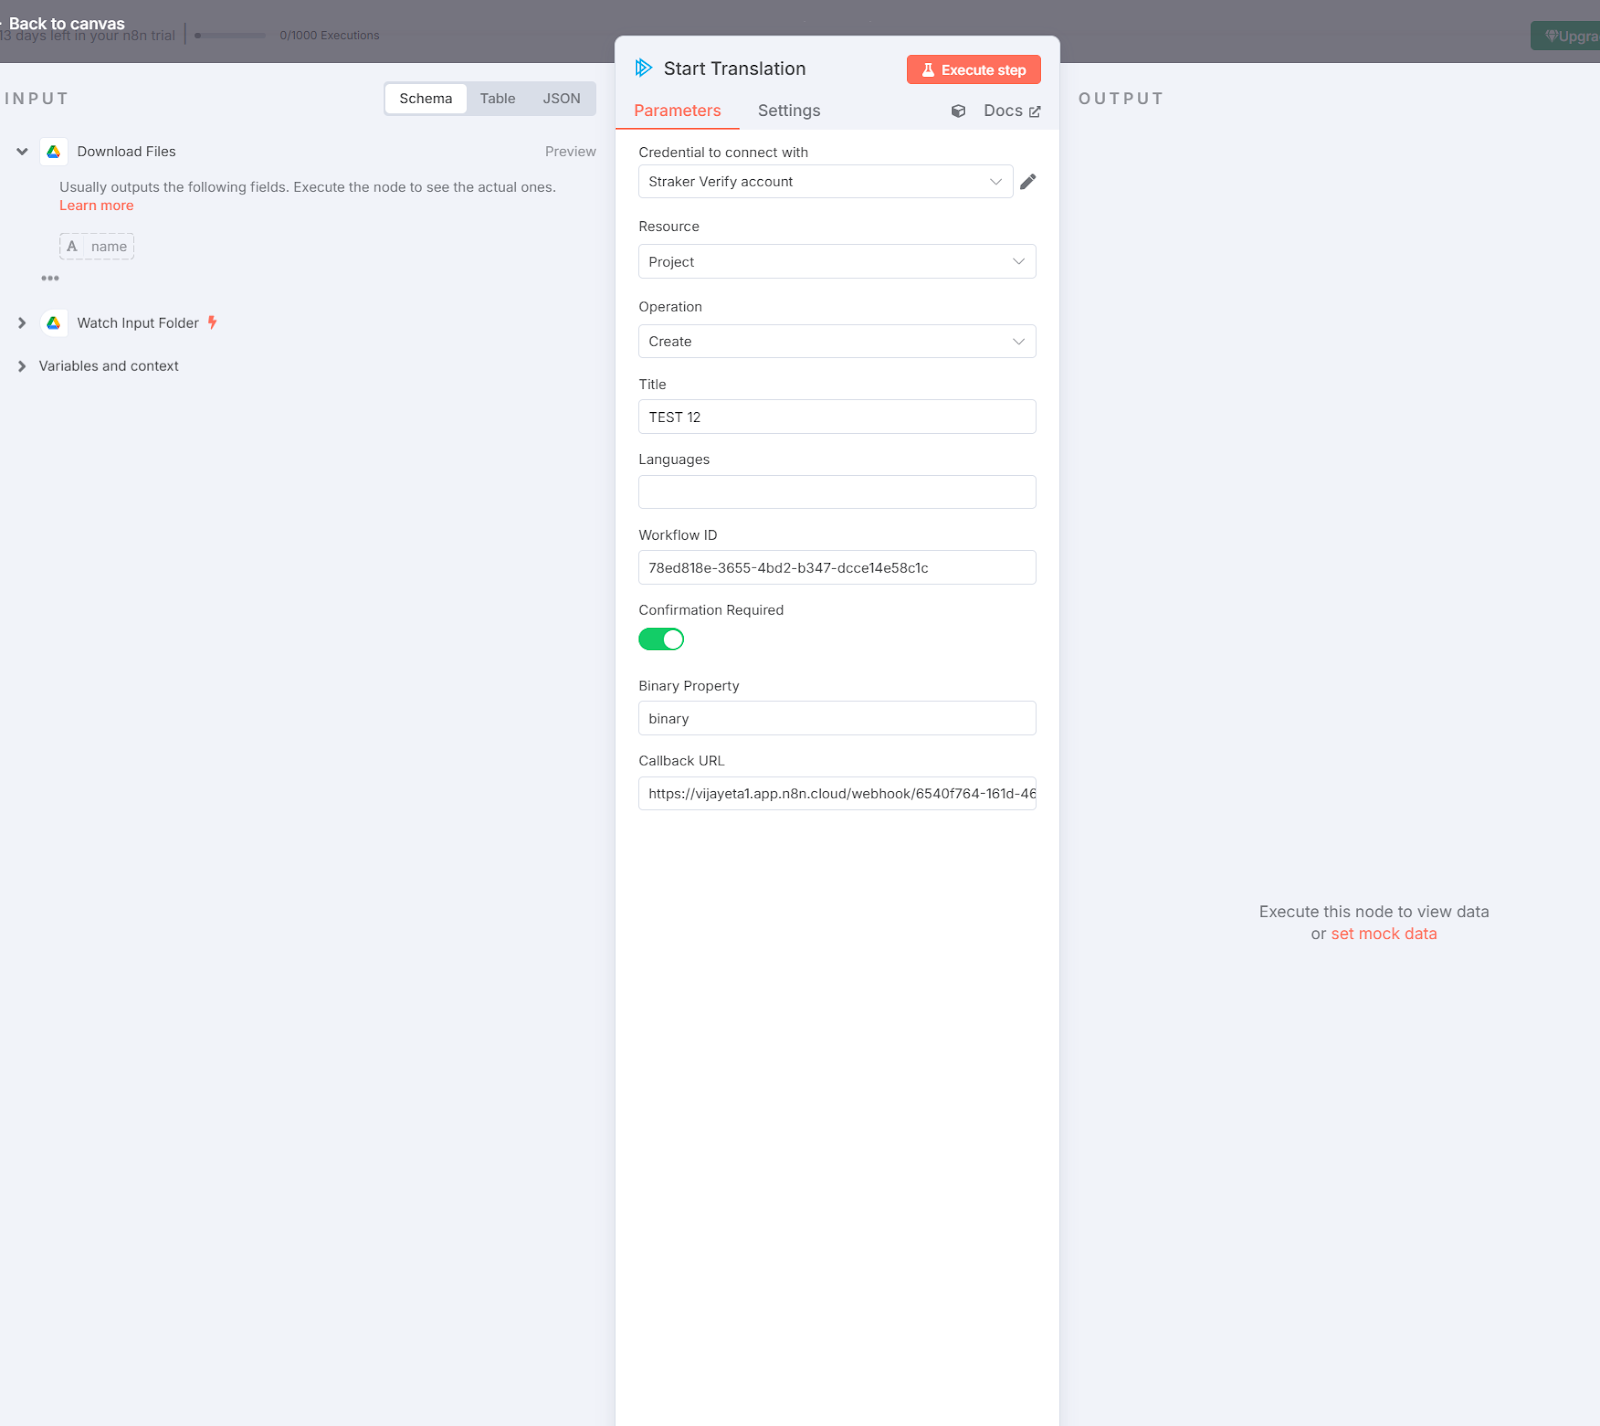
5. Next, go to ‘Wait for Completion’ Node to obtain your callback URL. Under the ‘Production URL’, copy the URL.
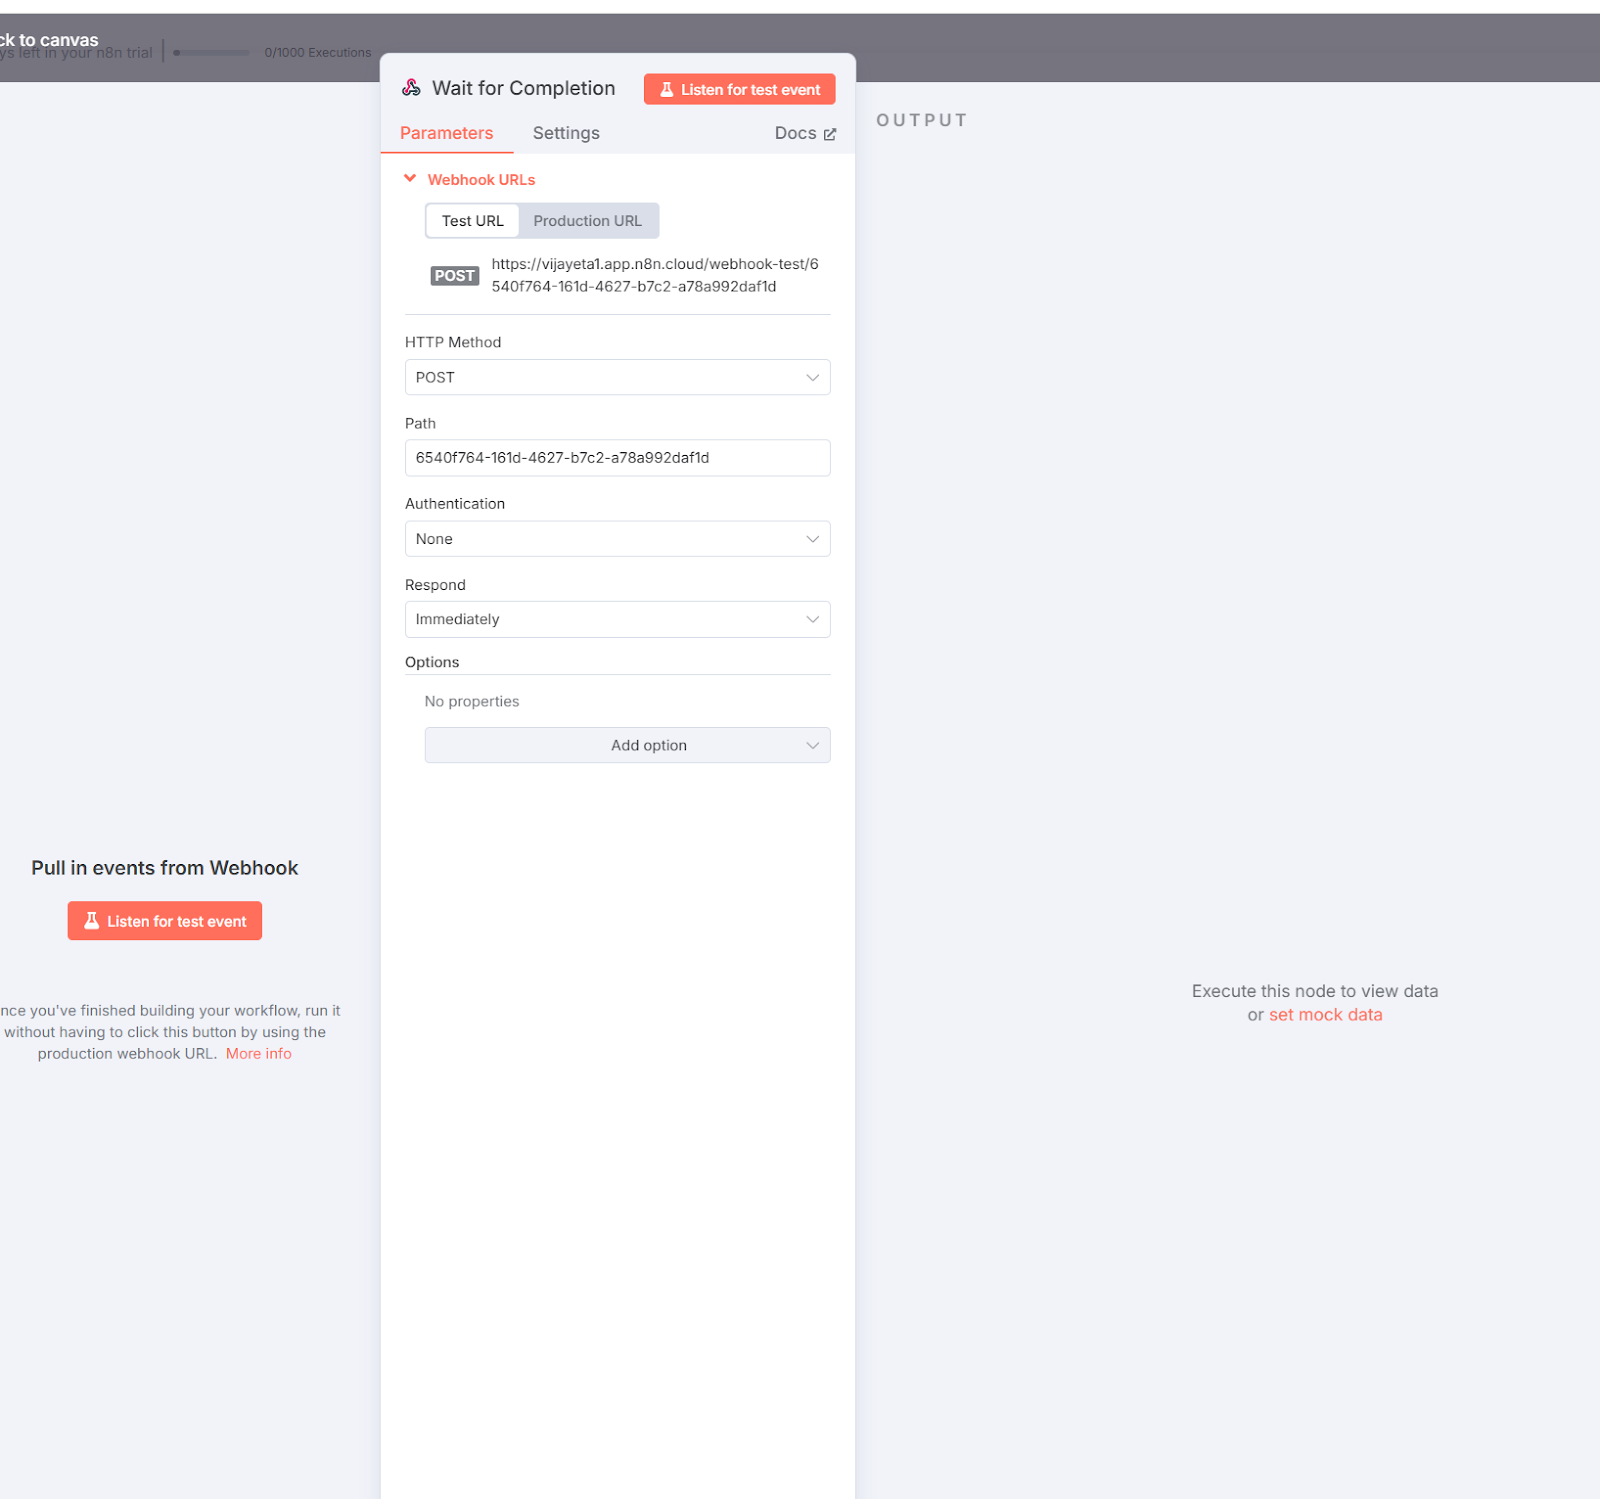
6. Now return to the previous ‘Start Translation’ node, paste the URL under ‘Callback URL’
7. Next, click ‘Save to Output Folder’ and select your ‘output folder’ that you have already created in your Google Drive. If you haven’t, you need to create another folder in your Google Drive and name it ‘Output folder’.
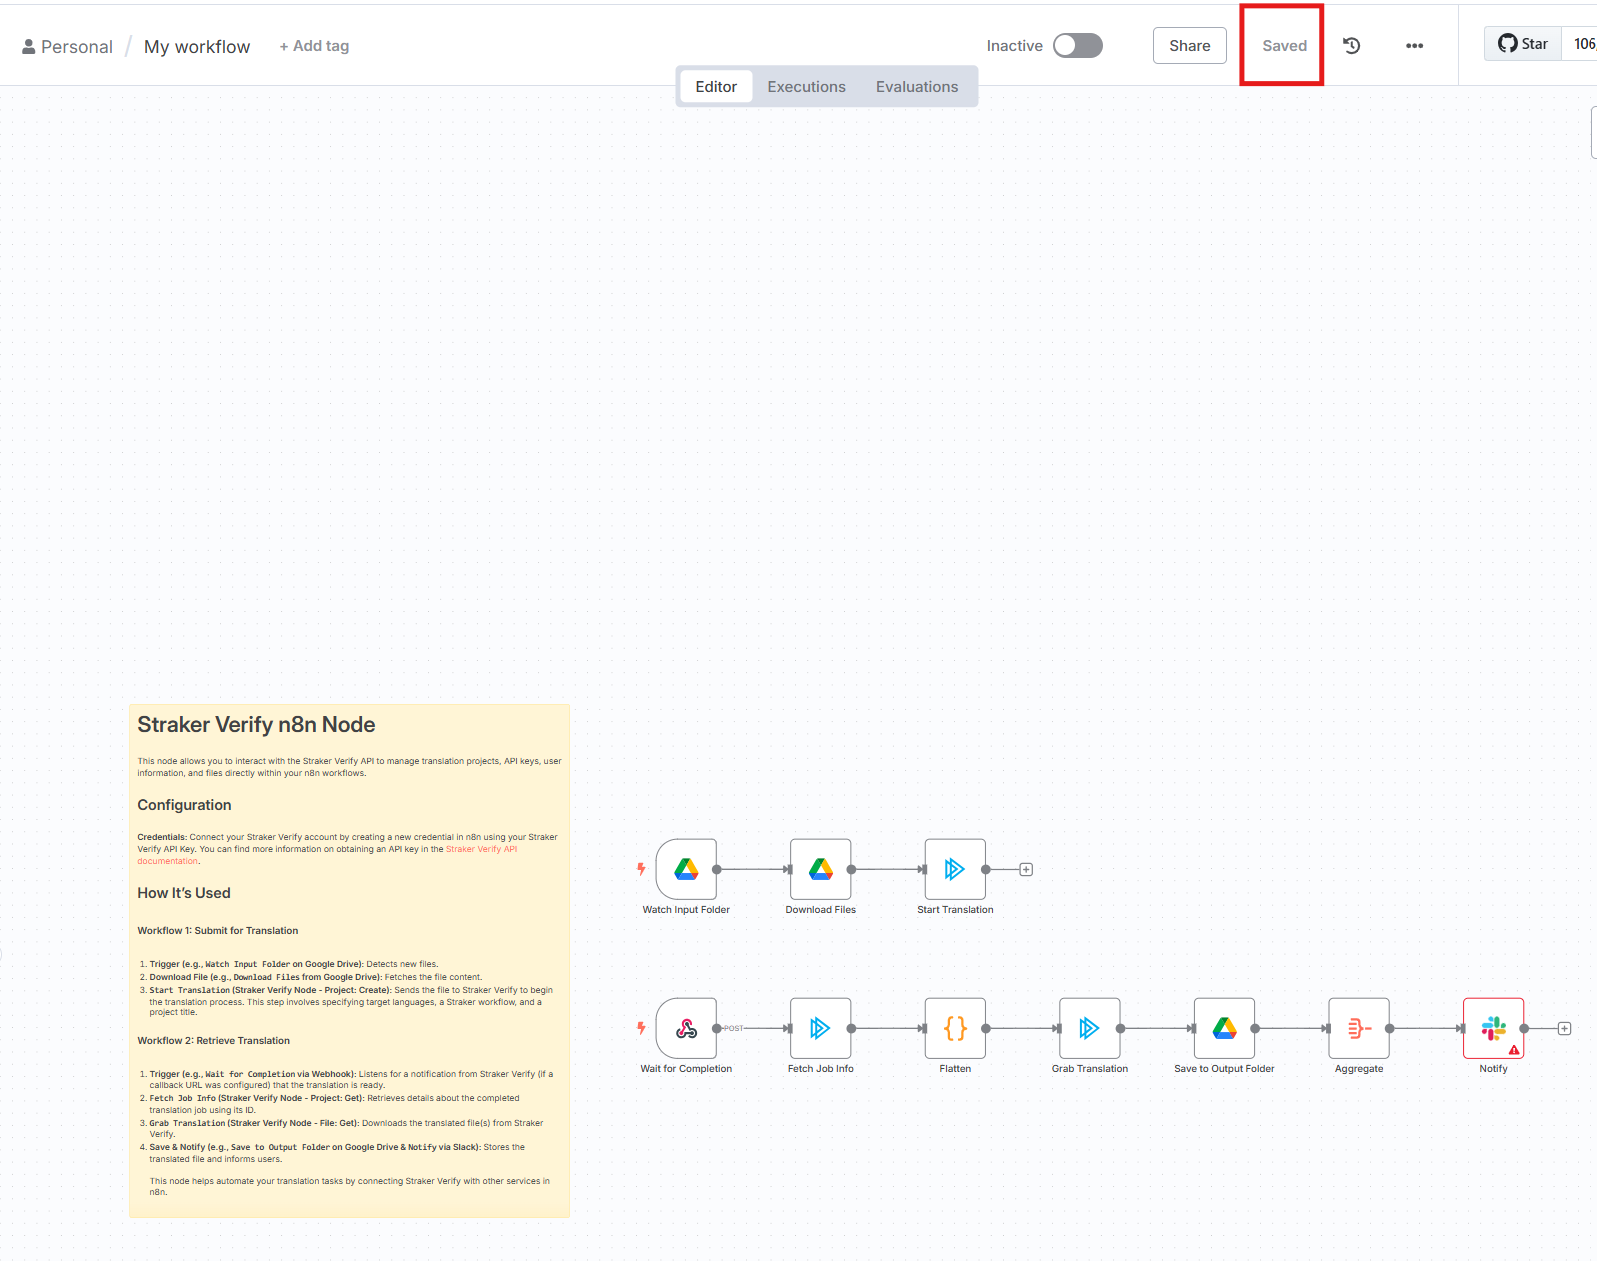
8. Finally toggle 'Inactive' to 'Activate the Workflow'
Now simply watch your workflow in action!